
The loquat is a fruit tree native to China, from where it spread to Japan and later to most of the world. It is a tree up to 10 meters high and is popular for its resistance and delicious fruit. It is currently a naturalized species in countries such as India, Argentina and Pakistan, as well as in the Canary Islands and the Mediterranean basin. Many people who are fond of gardening wonder how to raise a loquat seed so that a tree grows from the beginning.
For this reason, in this article we are going to tell you what are the steps to follow to learn how to plant a loquat seed and make a tree grow.
When should medlars be planted?

The prevailing climate in the region determines the best time to plant this tree and its delicious fruit. If you live in an area with a year-round tropical or temperate climate, you can grow medlars at any time without worry. In this sense, it is an undemanding fruit tree, and as long as the newly born seedling is not exposed to very low temperatures or strong sunlight, it will have no problems whatever the time of year.
On the other hand, if you live in a climate with four distinct seasons, it’s important to plant the seed after the worst of the cold has passed, while giving it enough time to grow and gain vigor and strength before facing the harsh winters. For this reason, it is best to sow the medlar pit at the end of winter, allowing newly sprouted plants to enjoy the spring weatherwhich is more benign in this sense. You can also plant the medlar later, but try to plant them in a dark place, as they can dehydrate or burn.
How to plant a medlar bone

While medlars are often grafted to speed up fruit set time, they can also be grown from seed without a problem. But this tree is not good for cuttings, and it is difficult to grow branches or twigs planted directly in the ground. Follow these steps to grow loquats from a hole:
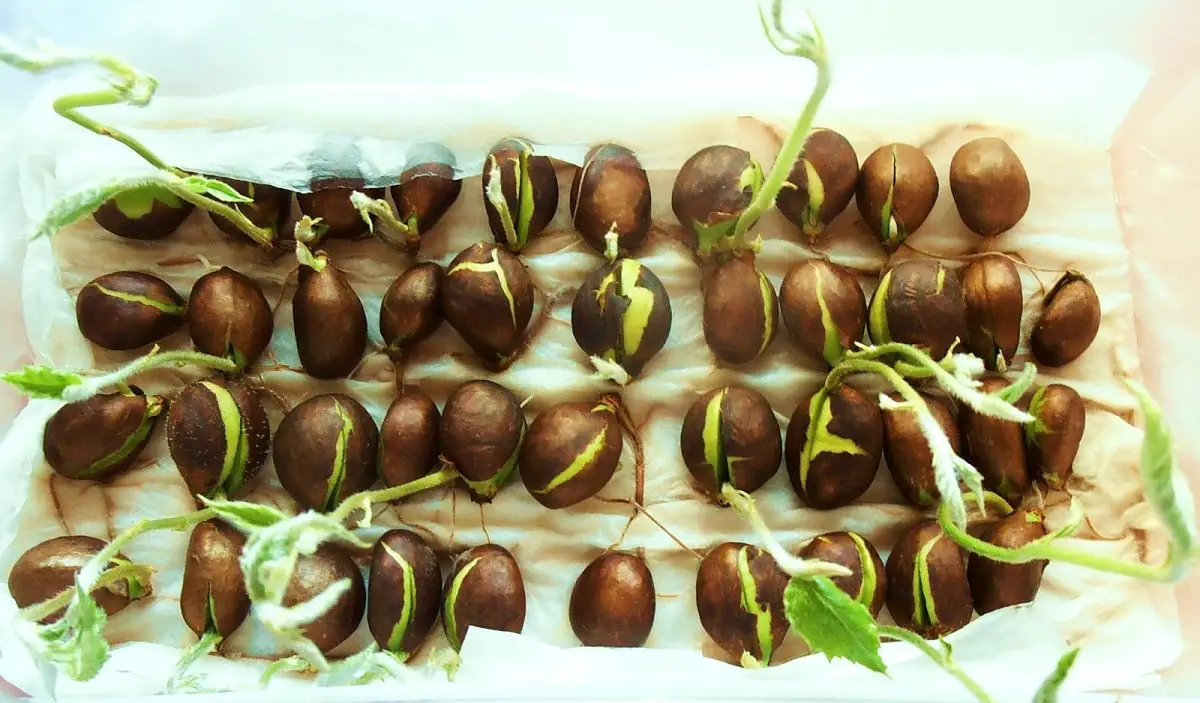
To learn how to plant a medlar bone, it can be done directly in the ground, but it is always recommended to germinate separately before transplanting. Wash the bones and make sure there is no pulp residue left. Then wrap them in damp kitchen paper and place them in a container, such as a glass, which should be covered with clear film to prevent moisture loss. In days or weeks, the seeds will germinate. If the kitchen paper dries out, be sure to moisten it again. Once the shoots or seedlings have developed leaves, they can be planted in the ground.
How to plant a medlar bone step by step

Next, we will see what steps must be followed, and in what order, so that the germination process works correctly.
- We take the pot (or container) and wash it with soap in case it has fungal spores or other microorganisms that can infect the seeds.
- Once it is washed, and also the lid, we close it so it doesn’t blow away. If not, you can use a piece of aluminum foil and fold it several times to seal the contents well.
- We extract the bone from the medlar and wash it with water until it is very clean. We know it is clean when no pulp residue is visible and it is no longer slippery to the touch.
- We take a certain amount of absorbent paper to cover the bottom of the container with a few layers (at least 3) and place it in that place.
- Little by little we pour the water on the paper placed at the bottom of the tupper until we see that it was completely wet but without forming.
- Place the medlar bone on the wet paper, in the center of the paper, making sure they are in good contact with the paper. Sometimes, due to the natural curvature of the seeds, we may have to turn them over for better access.
- We take at least three more layers of paper and lay them on top of the seeds. We can wet it before putting it on the seed, or pour a little water on it after it is in place. If the paper is strong, it is easier to moisten it first.
- The seed must be between the layer of paper below and the one we put on topand the contact between the seed and the wet paper should be as great as possible to accommodate the paper with the fingertips.
- Cover the container and take it to a warm place, preferably between 20 and 25°C. It is important that the light does not reach the bone because the first thing that emerges when germinating is the root, which does not develop well in the presence of light.
- After this process, we only have to check the status of the seeds every 2 or 3 days.
To do this, we will open the containers -or aluminum foil- and carefully lift the absorbent paper that covers them. We will observe the seeds to see if they have begun to sprout; they will give off white appendages, the roots, as they sprout. If they have not sprouted or are just starting, we will leave them a little longer until the roots are at least 1 cm long, at which point we will have to think about moving them to a pot with substrate or to the ground to maintain them.
Loquat Tree Care
As a practical guide for the care of a medlar tree, we offer you the following tips:
- Soil and Irrigation: The most important thing when caring for these trees is to try to give them well-drained soil, since this tree, although it resists drought well, needs constant humidity and frequent watering so that its fruit develops properly.
- Temperature: In terms of temperature, the tree can withstand frosts down to -10ºC, but its fruits and flowers do not tolerate such low temperatures.
- Fertilization: Fertilize every month, or every 15 days in the month of production to help it flower and bear fruit.
- Pruning: Prune this tree in its early years to shape and then maintain it, but keep in mind that pruning should be done in late summer due to its early production time.
I hope that with this information you can learn more about how to raise a loquat seed and its characteristics.