
As I anticipated a few days ago in the article of »How do you make a bonsai?», from now on and once a month I will guide you in the design of your future bonsai. I will explain in detail how it is wired, how it is transplanted, and why each of these things have to be done. And, of course, with lots of photos to make it even easier for you.
So if you want to start with me on the road of designing a bonsai, take a pen and paper, and let us begin.
Today, in mid-winter, what we are going to do is the first job, which will be choose the style we want to give and transplant it. But if the cold wave is still very present in your area, it is better to transplant when the temperatures begin to improve.
Tools
The tools we will need are:
- Low plastic pot
- Scissors
- A small handsaw
- A hook”
- Healing paste
- Akadama (if you don’t have a way to get it, you can use clay pellets or take a broken ceramic pot and »grind» it well)
- Vermiculite (or kiryuzuna, but when it comes to species that do so well where you live, you don’t need a special substrate)
- And of course the plant that we want to work
Step 1: choose a style

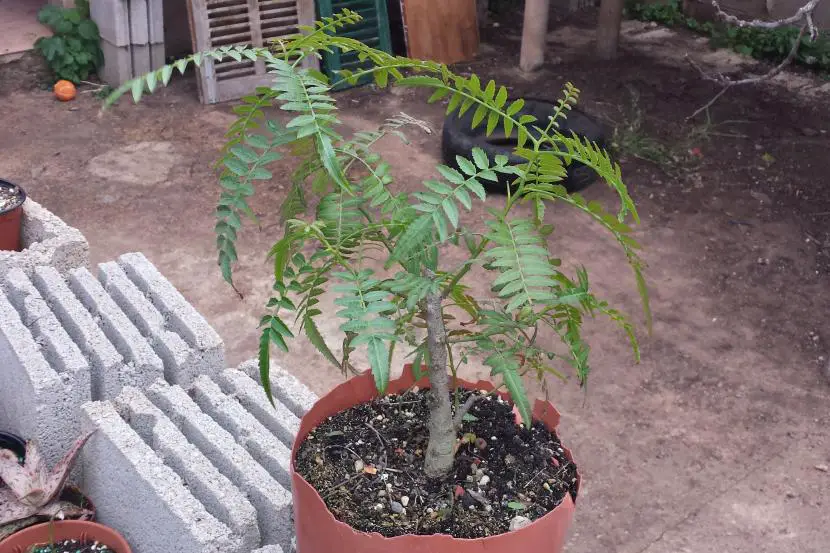
It’s not always easy to choose a styleSince the plants that we find in nurseries and garden centers are pruned thinking that these plants will be in gardens, and not in bonsai pots. With seedlings »raised» by us something similar happens: we usually let the tree grow as it wants for several years until we decide to start working on it. The specimen that I have chosen to make this guide is a Soft tendons seed. He is about three years old, and has been in a corner of a table until now. So at first glance it is not easy to define a design, and it is likely that it will end up changing as you work.
But … (fortunately there is always a but), It can help us a lot to know the following:
- There can be no branch that grows towards us
- The branches and their leaves, as far as possible, have to form a kind of Y
- There can be no branch that crosses another
- The Classical School tells us that there must be a certain triangularity, on all sides of the tree
Knowing this, in this case I have chosen to follow the style of bonsai with double trunk. That is, one day if everything goes well we will see the Schinus like this:

Much work remains to be done! But we must not be in a hurry. Patience must be our companion on this path to do it correctly.
Step 2: first pruning

There are several types of pruning: training, maintenance, and sanitation. The Schinus did not have to be done much, in fact, more than a pruning could be considered pinched, since only a few twigs have been removed.
To prune you can do it with scissors if the thickness of the branch (or root) is not too wide, or with a handsaw small. Do not forget to previously disinfect the tools with water and alcohol, and after having used them. It is also important that you put healing paste on each cutespecially if it has been large (like the one seen when pruning a thick branch).
Step 3: Transplant

Now the time has come to transplant to our tree. But for this we must first remove the substrate. How do we do it? With the help of a hook. As long as it is a native species or that it lives without problems in our area, we can do this task without worries; carefully, yes, but without having to worry about the »indirect pruning» of roots that we are doing.

Then we clean the roots with water.

Sometimes unforeseen events arise. We see Schinus a too thick root that needs to be pruned With a handsaw, down the red line

We put healing paste, and we leave it in a bowl with water.

We move on to the substrates. So that we don’t make a mistake with the amount of substrate you need, we put the akadama in the pot firstuntil the pot is almost full. Then, we add a layer of vermiculite.

When mixing it, we will have something like this. Ready to plant the tree! If you want, to make it easier to transplant, remove some substrate before putting the plant in, and then reinsert it to finish covering the roots.

Last we only have to water (with plain water, or by adding a few drops of Benerva, which you will find in pharmacies and will help the roots to recover better from the transplant), and place it in a location protected from direct sun.
And to finish…

Don’t worry if your tree’s leaves fall off. It is a very common reaction considering that several roots have been cut when removing the substrate. This is a pre-reaction to the spectacular sprouting that it will do in spring.
In the case of conifers, you should never do an intensive pruning or cleaning of the roots. These plants are supported by mycorrhizaewhich are a species of fungus beneficial (and vital) for the survival of these trees.
Next month we will talk about Fertilizers: the food of the tree that will help it to grow in an enviable state of health. But, if you have doubts, do not wait any longer and Contact us.