
One of the simplest things about vegetable gardening is eating a homegrown tomato. And when you’re growing tomatoes from seeds, you get to settle on from many sorts of tomato plants.
If indulging in homegrown tomatoes is that the goal, then starting tomatoes from seed is that the best thanks to getting there. Starting tomato seeds indoors allows you to regulate the earliest moments of your tomato plant’s life.
Healthy, happy seedlings do better at transplanting and yield a far better crop. Store-bought plants may are mislabeled, treated chemically, or stressed and this will really affect the results you get reception.
GROWING TOMATOES FROM SEEDS
Tomatoes are literally not hard to start out from the seed, but there are a couple of tricks of the trade which will assist you to recover results.
So during this article, we’ll go over:
● the perfect conditions for germinating tomato seeds
● the way to the lookout of tomato seedlings in their first weeks of life
● Answers to common questions on starting tomato seeds
Before you prepare to start out your tomato seeds, you initially must choose some tomato varieties for your garden. Not all tomatoes are created equal, so it’s good to try to your research before your pick among the thousands of choices.
WHEN to start out TOMATO SEEDS
You’re shooting for 4-6 weeks before your last frost. you’ll start them earlier, but any but 4 weeks and you would possibly not have enough season to urge fruit off your plants.
If you’re new gardening, using seed starting calculators is super helpful. But if you’ve been gardening a short time and know your approximate frost dates, start your plants 1-2 months before your last spring frost.
HOW TO SPROUT TOMATO SEEDS
STEP 1: FILL YOUR CONTAINER WITH PREMOISTENED GERMINATING MIX ALL THE thanks to the highest.
Especially if you’re employing a soilless germinating mixture, wetting it down before you fill your containers makes sure that you simply get even moisture throughout.
Prevent air pockets (where roots can’t grow) by tapping your container to form sure soil settles into all the spaces. refill with more germ mix if needed.
STEP 2: PUT SEEDS within the CONTAINER
There’s not a true science to the present, but you’ll do a couple of things to make sure the simplest results.
➤ Don’t set your seeds too deep. If you push your seeds too deep, they’ll have trouble beginning of the soil. I exploit my pointer finger to try to to this: up to the nail bed but not past the primary knuckle.
➤ Don’t crowd them. It’s okay to place multiple seeds into your container, but if they’re too close the roots will get all tangled. you’ll always cut some out, but if you would like to stay all of your seedlings, confirm there’s enough space to separate them later.
➤ Do cover them lightly with germ mix or vermiculite.
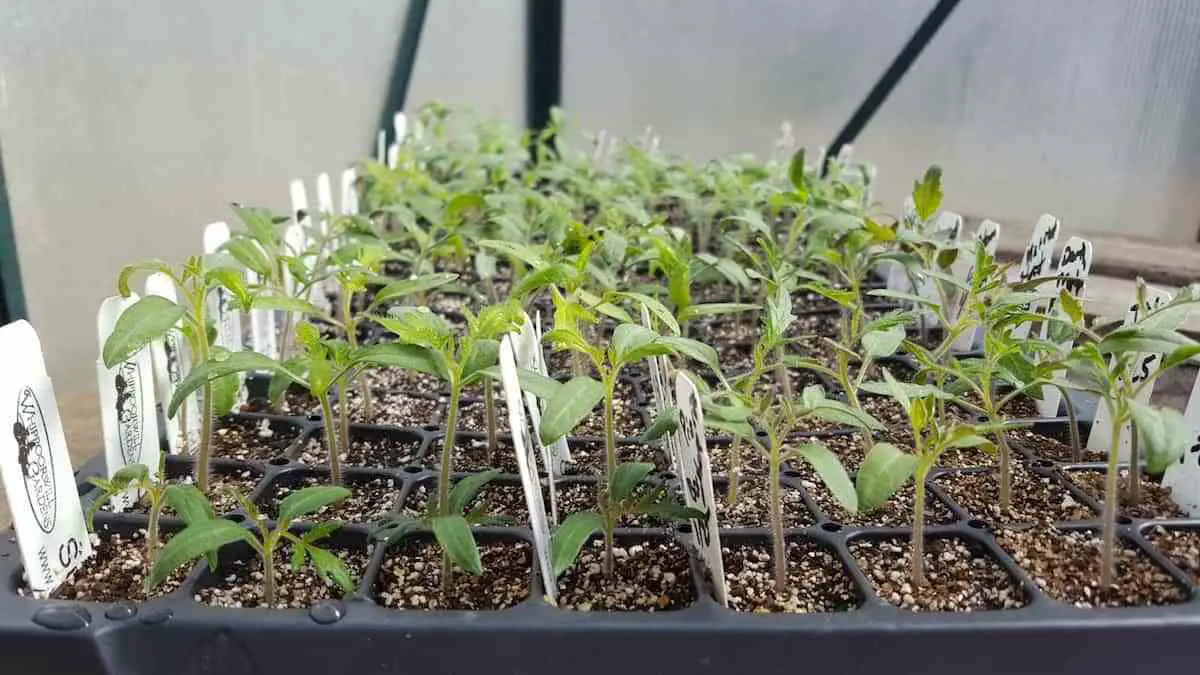
STEP 3: LABEL CONTAINER
I recommend putting the variability name, number planted, and date planted.
STEP 4: SOAK THEM WITH WATER, THEN COVER THE CONTAINER
Give your freshly planted seeds a healthy watering. You don’t want them swimming in soggy soil, but you are doing want to form sure they maintain some moisture.
Placing a dome lid over your tray or putting your tray during a bag will help keep the moisture in and slow drying.
STEP 5: SET THEM ON A HEAT MAT
Here’s where the supplies you select can make or break your results. to take care of temperature a perfect soil temperature of 80-85 degrees, you actually need a heat mat.
If you are doing use a heat mat, confirm you get one with a thermometer so you’ll accurately control the soil temperature and not burn them up.
Just setting your seeds inside your home is probably warm enough but you’ll give them a lift by placing your seed tray on top of your refrigerator.
FYI: Don’t attempt to use a hot pad, they get way too hot and it’s very easy to cook your seeds and seedlings.
At cooler temperatures (75-80F), you’ll expect germination to be slower and fewer consistent-meaning a number of your seeds might not sprout. Give them up to 10-14 days to sprout if you’re not employing a heat source.
STEP 6: PUT UP a light-weight
Tomatoes don’t need light to germinate but hanging it on day one means it’s there as soon as that first seeding appears. Waiting to hold the sunshine can cause problems…namely long leggy stems.
You can use a daily shop light with a bright white bulb or buy a seedling specific grow light. Hang the shop light just a few inches above your seedling trays. If you’re using, bright LED grows lights you don’t want them quite as close.
GROWING TOMATOES FROM SEED FAQS
HOW MANY TOMATO SEEDS PER CONTAINER?
This is up to you, but here’s my recommendation. If they’re fresh seeds and you’ve got a heat mat found out, you’ll probably get on the brink of 100% germination. So plant exactly what you would like plus maybe one or two more.
If the seeds are old, were saved reception not using fermentation, or if you don’t have a heat mat found out, plant a couple of extra just in case they don’t all come up.
If you plant extra seeds and that they all pop, cut out the weakest sprouts and leave only what you would like.
HOW LONG DOES IT deem TOMATO SEEDS TO SPROUT?
It will take as few as 2 and up to 10 days for your seeds to sprout.
DO I want TO FERTILIZE TOMATO SEEDLINGS?
Seedlings will need fertilizer once they’re about 2 weeks old. We usually don’t fertilizer until after we’ve transplanted them from the tiny cell seed starting trays.
CARING FOR TOMATO SEEDLINGS AFTER THEY SPROUT
Once they sprout, still check on your seedlings daily. Sprouted tomato seedlings simply need water and lightweight for the subsequent week or two.
Keep them covered and on heat to facilitate sprouting and water when the highest of the soil appears dry. After 10 or more days have passed (or when all the seeds sprout), you’ll remove the lid and pull them off the warmth mat.
