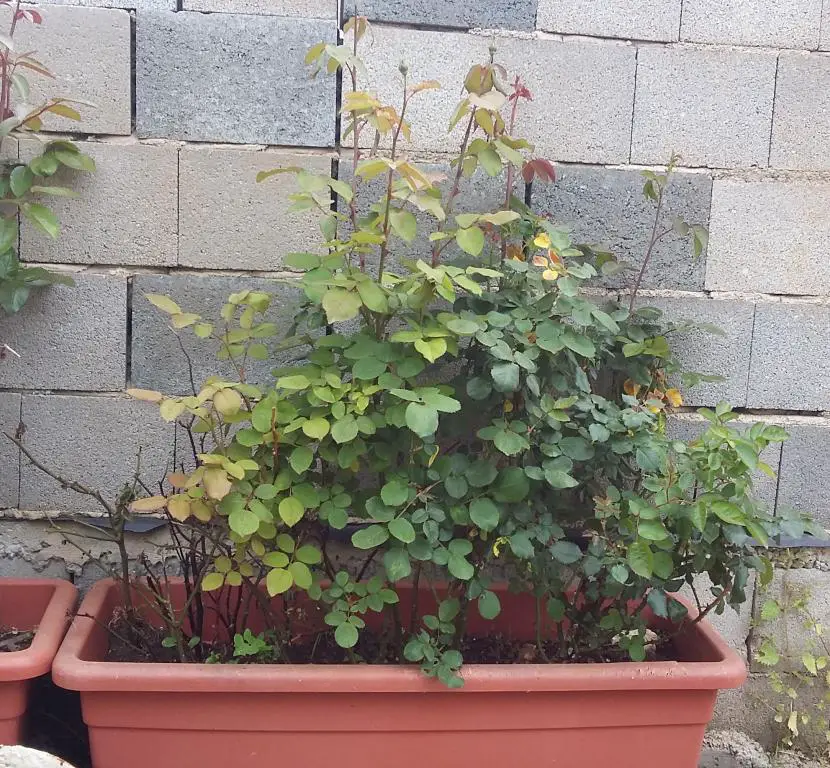

Hello everyone! How are you doing in your garden design? Do you remember that I mentioned last week that today would bring you a surprise? Well, that surprise has to do with these rose bushes that you can see in the image that heads the article.
We will learn to build a planter with blocks where you can have your corner of aromatic plants, or flowers. You dare?
To make it easier, let’s go step by step. Let’s get started:
Step One – Preparing the Ground

To prepare the ground we have to remove the grass, level a bit the earth, and if you have dogs … wait for them to give you the go-ahead (they will show you if they lie down on it) … Well, this last one is a little anecdote that I wanted to share with you. Finally there are those who advise moisten the earthbut this is optional.
Second step – Take the blocks and see how our planter will look

We will use as many blocks as we need. In this case, four blocks of approximately 50x15cm have been used, as a rather small planter was needed.
Third step – Make the concrete
Making good concrete is the most »complicated» part, but it is important to do it if we want the blocks to be well fixed on the ground. Proceed as follows (taking into account the size of the planter we will add more or less material):
- In a wheelbarrow We will add a bag of picadín and a quarter of a bag of cement.
- Lo we will mix well, conscientiously.
- Then let’s pour some waterand we continue mixing so that everything is well moistened.
- If we see that more water is needed, we will add more little by little to avoid ending up having a paste that is too watery (if this happens to you, you can simply remove the excess with a bucket).
Step Four – Build the Planter

And now yes, touch the construction proper. We will do it by putting block after block, that is, until we have finished putting one, we will not put the next one. It is recommended that it be as level as possible, and therefore we can use a level used for construction. Now, I must confess that I have not used it. What I have done has been to put all the blocks at the same height more or less, putting the necessary amount of concrete on the ground, and placing the block in such a way that it is more or less straight.
Once they are all set, we will fill the holes with concrete. If we see that we are not going to have enough material, or if we plan to do more construction things in the garden or at home, We can fill them with earth or gravel and then put a thin layer of concrete on top. Next, we will pass a trowel over the surface to remove the excess paste.
Step Five – Plant the Plants

Let’s move on to the gardening part: let’s plant the plants. We will do this as if it were a plastic planter: removing the plants from their previous pot and planting them in their new place.

They are already planted! If we have done a drastic root pruning (for example, if we have removed half a root ball), we have to do the same with the aerial part. To do this, with the help of pruning shears, we will lower the height of the stems between 5 and 10cm according to the size of the plant.

Finally, we will water generously, moistening the entire substrate well.
Step Six (Optional) – Protect Plants from Animals

If you have animals (cats, dogs) that love to dig in the dirt, then we will have to protect your planter at least temporarily. We will only need four rods or long sticks, metallic cloth and wire.

We have to put two rods in the hole of the blocks that are next to the wall, and another two in the one that is located in the middle of the blocks in front. The concrete, when it is finished drying, will prevent them from moving.

We put the wire mesh, and we fasten it to the rods with wire. And ready! It is true that it does not look too good, but this will give the plants time to root and occupy the entire planter. Once they do, we can remove their protection.
Still, this planter is not finished. Later we will see how can you paint to make plants look even prettier than they already are.
And that’s all. What do you think? Next week we will learn how to fertilize our garden. Until next Monday!
